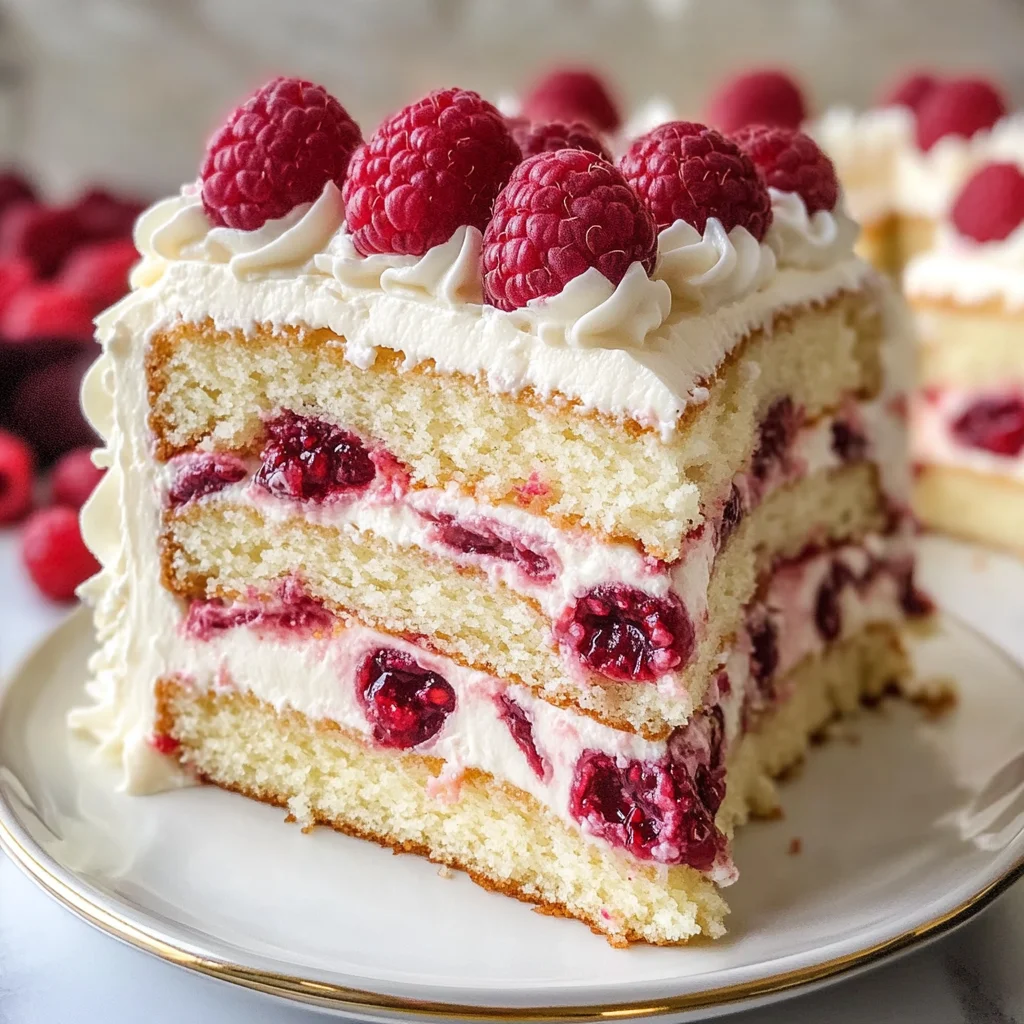
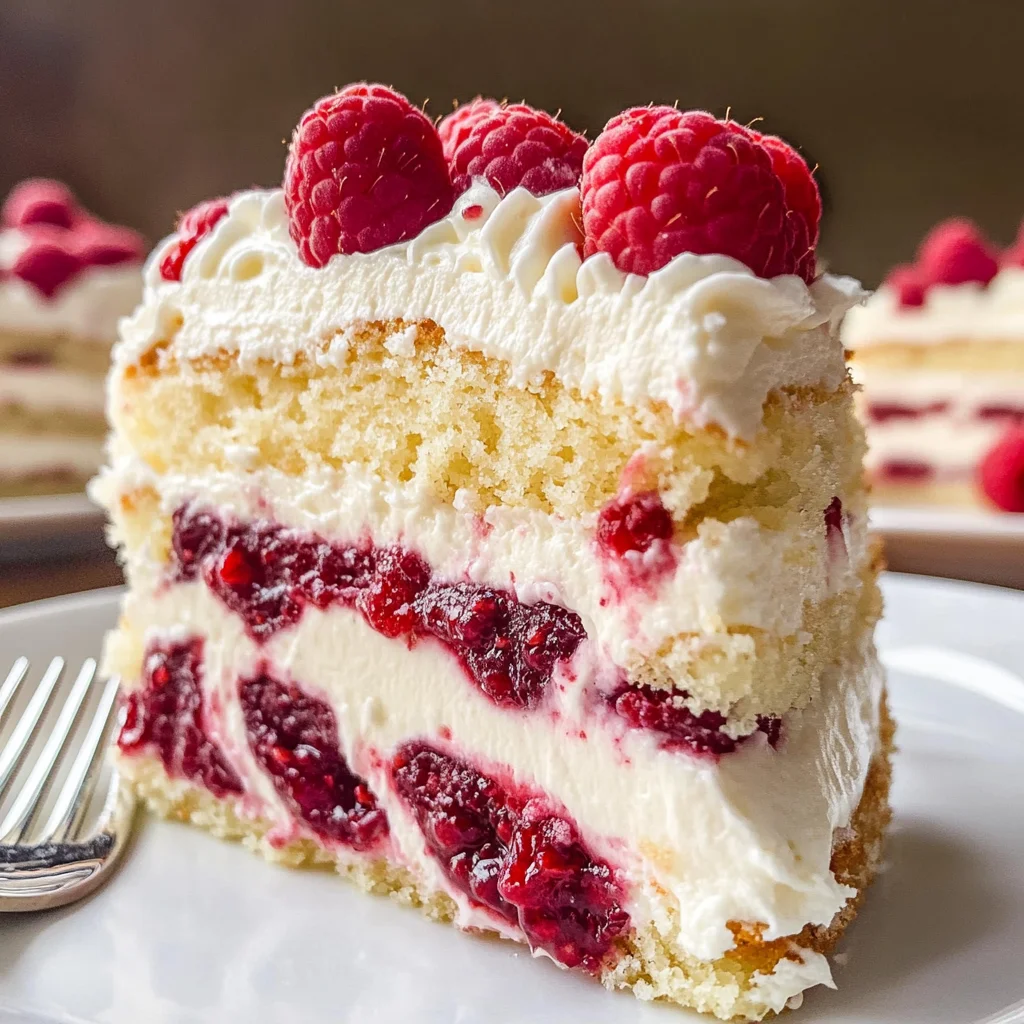
White Chocolate Raspberry Dream Cake
If you’re looking for a dessert that feels special yet is surprisingly easy to make, you’ve landed in the right place! This White Chocolate Raspberry Dream Cake is not just a cake; it’s an experience. With its layers of moist cake, creamy white chocolate, and the delightful burst of fresh raspberries, this recipe brings a touch of magic to any occasion. Whether it’s a busy weeknight treat or a centerpiece at family gatherings, this cake is sure to impress.
What makes this recipe even better is how versatile it is. You can whip it up for birthdays, anniversaries, or even just as a sweet surprise for yourself. Trust me, once you take that first bite, you’ll understand why it’s become one of my all-time favorites!
Why You’ll Love This Recipe
- Effortlessly Delicious: This cake is packed with flavor but easy to prepare, making it perfect for bakers of all skill levels.
- Family-Friendly Delight: Kids and adults alike are sure to fall in love with the sweet and tangy combination of white chocolate and raspberries.
- Make-Ahead Option: You can bake this cake a day in advance. Just chill and serve when you’re ready!
- Stunning Presentation: The layers and fresh raspberries on top create an eye-catching dessert that will wow your guests.
Ingredients You’ll Need
To create this delightful White Chocolate Raspberry Dream Cake, you’ll need some simple and wholesome ingredients that you might already have in your pantry. Let’s gather everything we need!
For the Cake
- 2 1/2 cups all-purpose flour
- 2 teaspoons baking powder
- 1/2 teaspoon baking soda
- 1/2 teaspoon salt
- 1 cup unsalted butter
- 1 1/2 cups granulated sugar
- 4 large eggs
- 1 teaspoon vanilla extract
- 1 cup whole milk
- 1/2 cup sour cream
- 6 ounces white chocolate, melted
For the Filling and Topping
- 1 1/2 cups fresh raspberries
- 1/2 cup raspberry jam
- 2 cups heavy whipping cream
- 2 tablespoons powdered sugar
- 1 teaspoon vanilla extract
Variations
One of the best things about this recipe is its flexibility! Feel free to get creative with these fun variations:
- Add Citrus Zest: Enhance the flavor by mixing in some lemon or orange zest into the batter for a zesty twist.
- Use Different Berries: Swap out raspberries for strawberries or blueberries if that’s what you have on hand!
- Chocolate Drizzle: For an extra indulgent touch, drizzle some melted dark chocolate over the top before serving.
- Layer with Other Flavors: Alternate layers with lemon curd or another fruit jam for added complexity.
How to Make White Chocolate Raspberry Dream Cake
Step 1: Preheat Your Oven
Preheat your oven to 350°F (175°C). This step ensures your cakes rise beautifully and bake evenly.
Step 2: Prepare Your Pans
Grease and flour two 9-inch round cake pans. Doing this prevents the cake from sticking and helps achieve those perfect clean edges when you flip them out.
Step 3: Mix Dry Ingredients
In a medium-sized bowl, whisk together the flour, baking powder, baking soda, and salt until well combined. This helps distribute the leavening agents evenly throughout the flour for a light texture.
Step 4: Cream Butter and Sugar
In a large mixing bowl, cream together the unsalted butter and granulated sugar using an electric mixer on medium speed until light and fluffy—about 3-4 minutes. This process incorporates air into your mixture, giving your cake its lovely rise.
Step 5: Add Eggs
Add the eggs one at a time to the butter mixture while beating well after each addition. Beating well helps emulsify everything together for a smooth batter.
Step 6: Incorporate Vanilla
Mix in the vanilla extract until fully incorporated. The aroma will fill your kitchen with warmth!
Step 7: Combine Wet Ingredients
In another bowl, combine whole milk and sour cream until smooth. This adds moisture to our cake while also contributing richness.
Step 8: Combine Mixtures
Gradually add the dry ingredients into the butter mixture alternating with the milk-sour cream mixture—beginning and ending with dry ingredients. Mixing alternately helps maintain a tender texture without overworking the batter.
Step 9: Add White Chocolate
Gently fold in melted white chocolate using a spatula until fully incorporated. This gives our cake that luxurious flavor we’re after.
Step 10: Bake Your Cakes
Divide batter evenly between prepared pans and smooth out tops with a spatula. Bake for 25-30 minutes or until golden brown when tested with a toothpick.
Step 11: Cool Cakes
Once out of the oven, let cakes cool in their pans for about 10 minutes before transferring them onto wire racks to cool completely. Cooling prevents sogginess!
Step 12: Prepare Raspberry Filling
While cakes cool, mash fresh raspberries in a bowl until they break down into small pieces. Stir in raspberry jam until fully combined to create that lovely filling!
Step 13: Make Whipped Cream
In another large bowl, beat heavy whipping cream with powdered sugar and vanilla extract on high speed until stiff peaks form. A good whipped cream will hold its shape atop our delicious layers!
Step 14: Assemble Your Cake
Once cakes are completely cool, place one layer on your serving platter. Spread an even layer of raspberry filling over it followed by whipped cream for an irresistible combo!
Step 15: Finish Layering
Place second layer on top gently pressing down before spreading remaining whipped cream over top and sides of cake.
Step 16: Garnish & Chill
Garnish with fresh raspberries arranged decoratively on top! Chill in refrigerator for at least an hour before serving so those flavors meld beautifully.
Now you’re all set to enjoy your homemade White Chocolate Raspberry Dream Cake! It’ll be hard not to take seconds (or thirds!). Enjoy every delicious bite!
Pro Tips for Making White Chocolate Raspberry Dream Cake
Baking can be a delightful adventure, and with these tips, you’ll ensure your cake turns out perfectly every time!
-
Use room temperature ingredients: Allowing butter, eggs, and milk to come to room temperature helps them blend more smoothly into the batter, resulting in a lighter and fluffier cake.
-
Don’t overmix the batter: Mixing until just combined is key to achieving that tender crumb. Overmixing can lead to a dense texture, so be gentle when folding in the melted white chocolate.
-
Choose fresh raspberries: Fresh berries not only taste better but also provide a beautiful burst of flavor and color. If fresh isn’t available, frozen raspberries can work, but make sure to thaw and drain them first.
-
Chill the cake before serving: Letting the cake chill in the refrigerator for at least an hour after assembly allows the flavors to meld together beautifully and makes it easier to slice.
-
Experiment with layers: Don’t hesitate to add more raspberry filling or whipped cream between layers if you’re feeling adventurous; it enhances both flavor and presentation!
How to Serve White Chocolate Raspberry Dream Cake
Presentation is key when serving this stunning cake! Here are some fun ways to elevate your dessert experience.
Garnishes
- Fresh Mint Leaves: A few sprigs of mint on top of each slice add a pop of color and a refreshing aroma.
- Shaved White Chocolate: Sprinkle some extra shaved white chocolate on top for an elegant touch that complements the flavors perfectly.
Side Dishes
- Vanilla Ice Cream: A scoop of creamy vanilla ice cream pairs wonderfully with the tartness of the raspberries and the richness of the white chocolate.
- Berry Compote: A simple berry compote made from simmered mixed berries can enhance each slice’s flavor while adding a lovely sauce for drizzling.
- Lemon Sorbet: The bright citrus notes of lemon sorbet provide a refreshing contrast to the sweetness of the cake, cleansing your palate beautifully.
- Coffee or Tea: A warm cup of coffee or tea serves as an ideal beverage companion, balancing the sweetness with its rich flavors.
Now that you’re equipped with these tips and serving ideas, go ahead and impress your friends and family with this delightful White Chocolate Raspberry Dream Cake! Enjoy every delicious bite!
Make Ahead and Storage
This White Chocolate Raspberry Dream Cake is perfect for meal prep! You can make it in advance and store it for later enjoyment, making it an ideal dessert for gatherings or special occasions.
Storing Leftovers
- Store any leftover cake in an airtight container in the refrigerator.
- It’s best consumed within 3-4 days for optimal freshness.
- If you notice any moisture, place a paper towel underneath the lid to absorb it.
Freezing
- Wrap individual slices of the cake tightly in plastic wrap before placing them in a freezer-safe bag.
- Alternatively, you can freeze the whole cake; just ensure it’s well-wrapped to prevent freezer burn.
- The cake can be frozen for up to 2 months.
Reheating
- To enjoy a slice, simply thaw it in the refrigerator overnight before serving.
- For a warm treat, you can microwave individual slices on low power for about 15-20 seconds.
FAQs
Here are some common questions about the White Chocolate Raspberry Dream Cake that may help you during your baking journey.
Can I use frozen raspberries for the White Chocolate Raspberry Dream Cake?
Yes, you can use frozen raspberries! Just make sure to thaw and drain them before using to avoid excess moisture in your filling.
How do I make my White Chocolate Raspberry Dream Cake even more decadent?
To elevate your cake, consider adding a layer of white chocolate ganache between the layers or drizzling it over the top before adding fresh raspberries.
Can I substitute the sour cream in this recipe?
Absolutely! You can replace sour cream with plain Greek yogurt or buttermilk for a similar texture and flavor profile.
Final Thoughts
I hope you find joy in creating this delightful White Chocolate Raspberry Dream Cake! With its perfect balance of sweetness and tartness, it’s bound to impress friends and family alike. Enjoy every moment of making this cake, and don’t forget to savor each delicious bite. Happy baking!
White Chocolate Raspberry Dream Cake
If you’re in search of a show-stopping dessert that’s easy to whip up, look no further than this White Chocolate Raspberry Dream Cake. This delightful treat showcases layers of moist cake infused with creamy white chocolate and fresh raspberries, creating a perfect harmony of sweet and tangy flavors. Ideal for any occasion—from birthdays to casual weeknight indulgences—this cake is not only delicious but also visually stunning with its vibrant raspberry topping. Impress your family and friends with this elegant dessert that tastes as good as it looks!
- Prep Time: 30 minutes
- Cook Time: 30 minutes
- Total Time: 1 hour
- Yield: Approximately 12 servings 1x
- Category: Dessert
- Method: Baking
- Cuisine: American
Ingredients
- 2 1/2 cups all-purpose flour
- 2 teaspoons baking powder
- 1/2 teaspoon baking soda
- 1/2 teaspoon salt
- 1 cup unsalted butter
- 1 1/2 cups granulated sugar
- 4 large eggs
- 1 teaspoon vanilla extract
- 1 cup whole milk
- 1/2 cup sour cream
- 6 ounces white chocolate, melted
- 1 1/2 cups fresh raspberries
- 1/2 cup raspberry jam
- 2 cups heavy whipping cream
- 2 tablespoons powdered sugar
Instructions
- Preheat your oven to 350°F (175°C) and grease two 9-inch round cake pans.
- In a bowl, whisk together flour, baking powder, baking soda, and salt.
- Cream the butter and sugar in a large mixing bowl until light and fluffy.
- Add the eggs one at a time, mixing well after each addition. Stir in vanilla extract.
- Combine milk and sour cream in another bowl; then alternate adding the dry ingredients and milk mixture to the butter mixture.
- Fold in melted white chocolate until fully incorporated.
- Divide the batter between prepared pans and bake for 25-30 minutes or until a toothpick comes out clean.
- Cool cakes in pans for 10 minutes before transferring them to wire racks to cool completely.
- For the filling, mash fresh raspberries and mix with raspberry jam.
- Whip cream with powdered sugar and vanilla until stiff peaks form.
- Assemble the cake by layering raspberry filling and whipped cream between the cooled cake layers, then top with remaining whipped cream and garnish with fresh raspberries.
Nutrition
- Serving Size: 1 slice (100g)
- Calories: 380
- Sugar: 28g
- Sodium: 180mg
- Fat: 24g
- Saturated Fat: 14g
- Unsaturated Fat: 8g
- Trans Fat: 0g
- Carbohydrates: 36g
- Fiber: 1g
- Protein: 5g
- Cholesterol: 80mg