Butterbeer cheesecake
If you’re looking for a dessert that feels like a warm hug, then you’ve come to the right place! Our Butterbeer cheesecake is not only delicious but also brings a sprinkle of magic to any occasion. Whether you’re hosting a cozy family gathering, celebrating a birthday, or just treating yourself on a busy weeknight, this creamy delight will surely impress everyone at the table. The combination of butterscotch and cream soda flavors makes it taste like you’re sipping on something enchanting!
This cheesecake is one of my all-time favorites because it’s easy to prepare and absolutely delightful. Plus, it’s a fantastic make-ahead option, allowing you to simply whip it up the day before your event and let it chill!
Why You’ll Love This Recipe
- Quick Preparation: With just 15 minutes of prep time, you’ll have more time to enjoy with friends and family.
- Family-Friendly: Everyone loves the sweet and creamy flavor of this cheesecake—it’s sure to be a hit with both kids and adults!
- Make-Ahead Convenience: Prepare this dessert in advance so that it’s ready when you are. Perfect for those busy days!
- Delicious Flavor: The enchanting blend of butterscotch and cream soda creates an irresistible treat that’s hard to resist.
Ingredients You’ll Need
Let’s gather some simple, wholesome ingredients that come together beautifully in our Butterbeer cheesecake. You might already have some of these in your kitchen!
For the Crust
- 2 cups graham cracker crumbs
- 1/4 cup granulated sugar
- 1/2 cup unsalted butter, melted
For the Cheesecake Filling
- 4 (8 oz.) packages cream cheese, softened
- 1/2 cup sour cream
- 3 large eggs
- 2 cups granulated sugar
- 1/2 tablespoon vanilla extract
- 1/2 tablespoon butter flavoring
- 1/2 cup butterscotch sauce
- 1/2 cup butterscotch chips
- 1/4 cup cream soda
For Topping
- 8 oz. tub of cool whip
Variations
This Butterbeer cheesecake recipe is quite flexible! Here are some fun variations to consider:
- Add a sprinkle of sea salt: A touch of flaky sea salt on top can elevate the flavors and add a nice contrast to the sweetness.
- Try different flavors: Swap out the butterscotch chips for chocolate chips or even caramel bits for an exciting twist!
- Change up the crust: Use crushed Oreos instead of graham crackers for a richer flavor that pairs well with the filling.
- Make it gluten-free: Substitute regular graham cracker crumbs with gluten-free ones to accommodate dietary needs without sacrificing taste.
How to Make Butterbeer cheesecake
Step 1: Preheat Your Oven
Before anything else, preheat your oven to 325°F (160°C). This ensures that your cheesecake bakes evenly from start to finish.
Step 2: Prepare the Crust
In a mixing bowl, combine graham cracker crumbs, 1/4 cup sugar, and melted butter until they’re well mixed. Press this mixture firmly into the bottom of an 8-inch springform pan. This crust is essential as it provides a crunchy base that complements the creamy filling.
Step 3: Mix the Cream Cheese Filling
In another large mixing bowl, beat the softened cream cheese until it’s smooth using an electric mixer. This step is crucial because smooth cream cheese will give your cheesecake its velvety texture.
Step 4: Add Sour Cream & Sugar
Next, mix in the sour cream until well combined. Then gradually add in 2 cups of granulated sugar while beating continuously. This helps create that luscious sweetness we all love!
Step 5: Incorporate Eggs & Flavorings
Beat in the eggs one at a time; make sure each egg is fully mixed into your batter before adding another. Stir in vanilla extract and butter flavoring until everything is smooth and creamy—this brings out all those enchanting flavors we adore.
Step 6: Add Butterscotch Goodness
Now it’s time for the magic! Stir in butterscotch sauce, cream soda, and butterscotch chips until well blended. This step infuses your cheesecake with all those delightful notes reminiscent of butterbeer.
Step 7: Bake Your Cheesecake
Pour your creamy filling over the prepared crust in the springform pan. Smooth out the top with a spatula for an even surface. Place this beauty in your preheated oven along with a pan of water on the rack below—it helps keep moisture during baking! Bake for about 60 minutes or until set around the edges with just a slight jiggle in the center.
Step 8: Cool Slowly
Once baked, turn off your oven but leave the cheesecake inside with the door slightly ajar for about an hour. This gradual cooling prevents cracks from forming on top—nobody wants that!
Step 9: Chill Thoroughly
After an hour, carefully remove your cheesecake from the oven and let it cool completely at room temperature before refrigerating for at least four hours—or overnight if you can wait! This step allows everything to set perfectly.
Step 10: Serve & Enjoy!
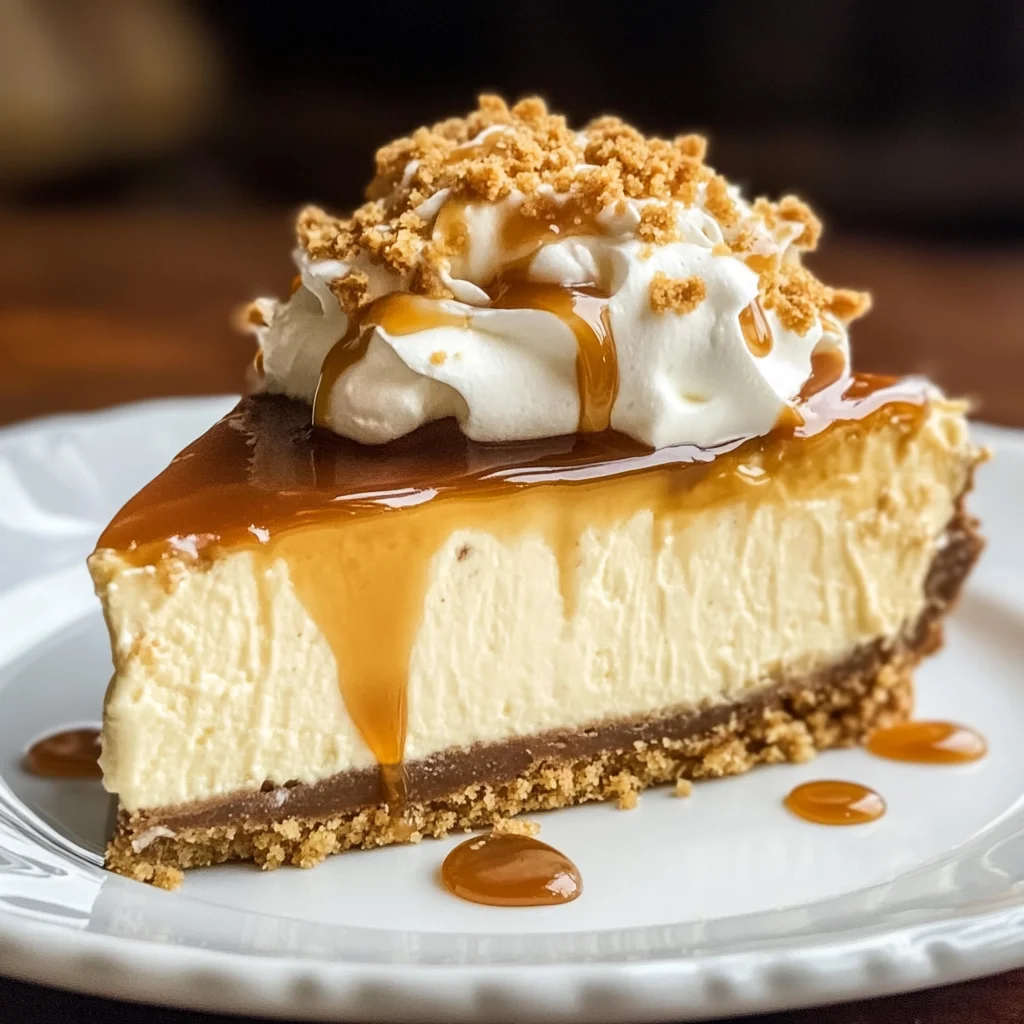
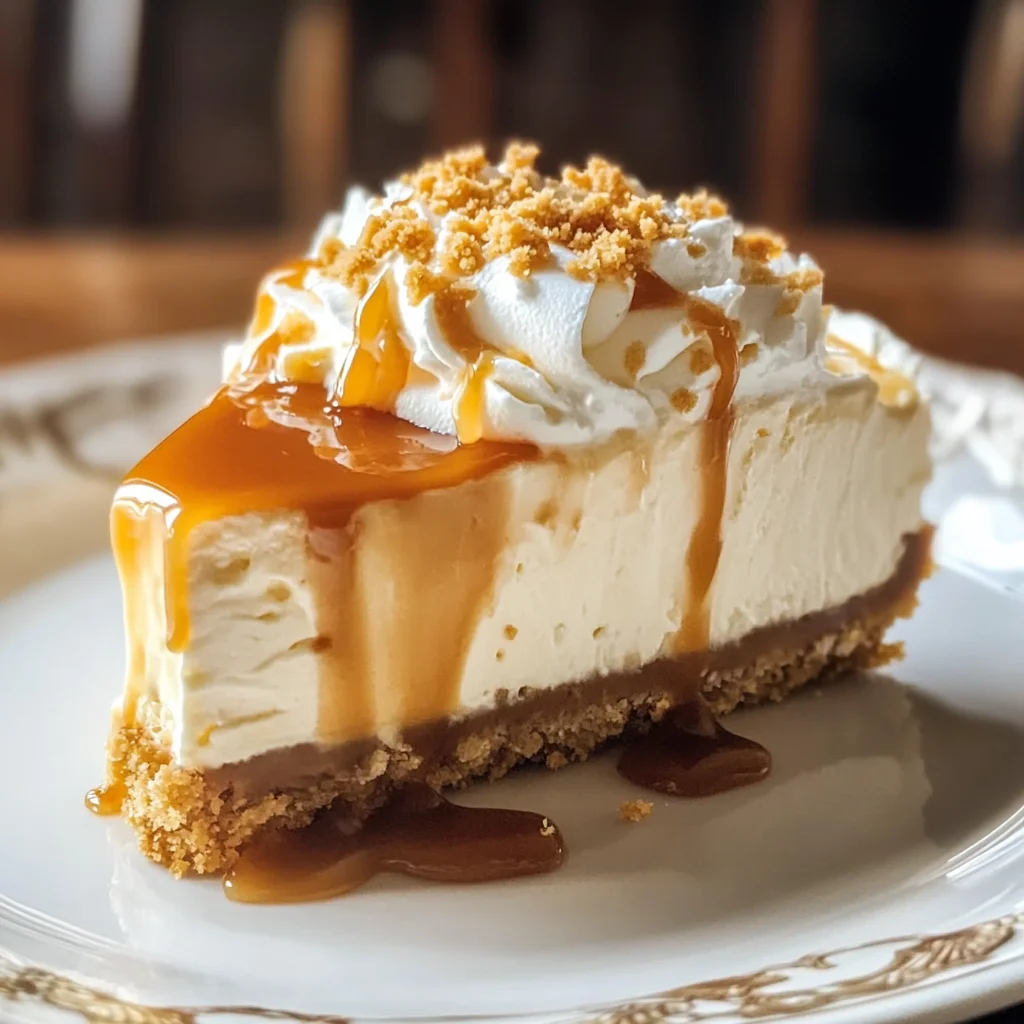
When you’re ready to serve, top with cool whip! Pipe swirls around the edge or fill up that center with a heaping mound topped off with extra butterscotch sauce. When everyone sees this gorgeous dessert, they won’t be able to resist!
I hope you enjoy making this Butterbeer cheesecake as much as I do! It’s truly magical every time you take a bite!
Pro Tips for Making Butterbeer Cheesecake
Creating the perfect Butterbeer cheesecake can be a magical experience, and these handy tips will help you achieve dessert perfection!
-
Use Room Temperature Ingredients: Bringing your cream cheese, eggs, and sour cream to room temperature ensures a smoother batter. This prevents lumps and creates a creamy texture that’s essential for cheesecakes.
-
Don’t Overmix: When adding the eggs, mix just until combined. Overmixing can incorporate too much air, which may lead to cracking as it bakes and cools.
-
Water Bath Method: Placing a pan of water in the oven while baking helps maintain moisture in the oven, which means a creamier cheesecake without cracks. It’s a little extra effort that goes a long way!
-
Chill Overnight: Allow your cheesecake to rest in the refrigerator overnight if possible. This not only improves flavor but also helps it set properly for easy slicing.
-
Experiment with Flavors: Feel free to add other flavors like cinnamon or nutmeg to the batter for an extra layer of warmth. Just remember, moderation is key to keep the butterscotch flavor at the forefront!
How to Serve Butterbeer Cheesecake
Presenting your Butterbeer cheesecake can be as delightful as making it! Here are some fun ideas to make this dessert even more enchanting for your guests.
Garnishes
- Butterscotch Sauce: Drizzle warm butterscotch sauce on top before serving for an extra touch of sweetness that ties into the cheesecake’s flavor profile.
- Whipped Cream: A dollop of light whipped cream adds a lovely contrast in texture, making each bite feel indulgent.
- Chocolate Shavings: Sprinkle some chocolate shavings on top for a visual appeal and a hint of chocolatey goodness that pairs well with butterscotch.
Side Dishes
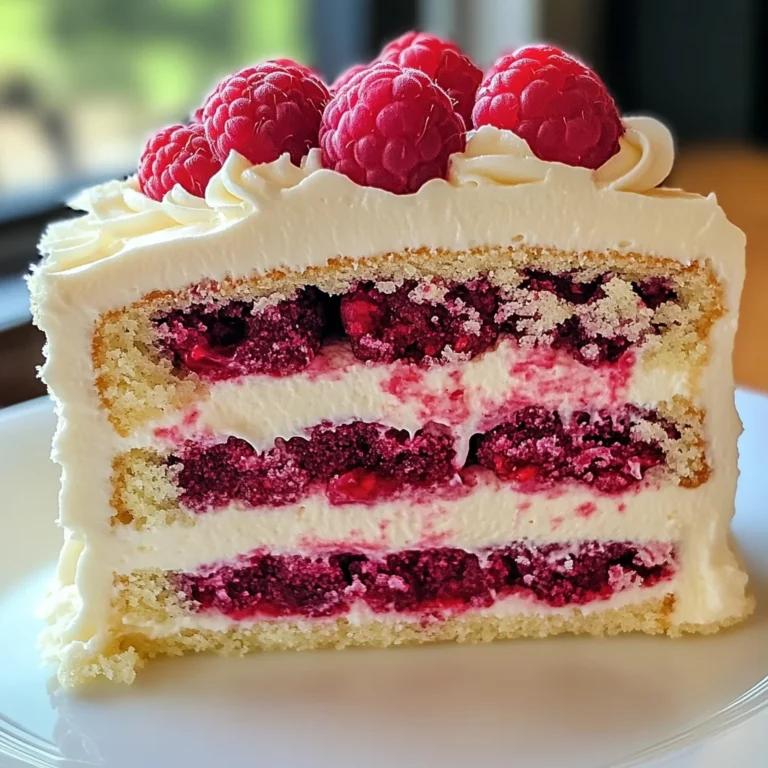
- Fresh Berries: Serve with a side of fresh strawberries or raspberries. Their tartness complements the sweetness of the cheesecake beautifully.
- Vanilla Ice Cream: A scoop of vanilla ice cream alongside your slice adds creaminess and is perfect for those who love an extra cold treat.
- Coffee or Tea: A warm cup of coffee or herbal tea balances out the sweetness of the cheesecake and offers a comforting finish to your meal.
- Fruit Salad: A light fruit salad can refresh the palate after enjoying this rich dessert, providing a nice contrast in flavors.
Enjoy crafting this Butterbeer cheesecake and presenting it in style—it’s sure to cast a spell over everyone who tries it!
Make Ahead and Storage
One of the best parts about this Butterbeer cheesecake is how well it lends itself to meal prep! You can easily make it ahead of time for special occasions or just to indulge in throughout the week. Here’s how to store and manage your delicious creation.
Storing Leftovers
- Allow the cheesecake to cool completely before storing.
- Cover the cheesecake with plastic wrap or aluminum foil, or place it in an airtight container.
- Store in the refrigerator for up to 5 days.
Freezing
- To freeze, ensure the cheesecake is fully set and cooled.
- Wrap it tightly in plastic wrap, followed by aluminum foil for extra protection.
- Freeze for up to 2 months. When ready to enjoy, thaw overnight in the refrigerator.
Reheating
- For best flavor, enjoy the cheesecake cold directly from the fridge.
- If you prefer a slightly softened texture, let it sit at room temperature for about 30 minutes before serving.
FAQs
Here are some common questions that might help you as you prepare your Butterbeer cheesecake!
How can I make my Butterbeer cheesecake extra creamy?
To achieve an extra creamy texture in your Butterbeer cheesecake, be sure to beat your cream cheese until it’s very smooth before adding other ingredients. Incorporating room temperature ingredients will also help prevent lumps and ensure a velvety finish.
Can I use a different type of crust for my Butterbeer cheesecake?
Absolutely! While graham cracker crust is traditional, feel free to get creative. You can use crushed cookies like vanilla wafers or even an oreo crust alternative. Just remember to adjust any sugar levels accordingly if using sweetened cookies!
How long does Butterbeer cheesecake last once made?
Your Butterbeer cheesecake will stay fresh and delicious in the refrigerator for up to 5 days when properly stored. If freezing, it can last up to 2 months!
What makes this Butterbeer cheesecake special?
This Butterbeer cheesecake stands out due to its unique combination of butterscotch flavor, cream soda essence, and creamy texture that brings together all the magical elements reminiscent of the beloved drink from the wizarding world.
Final Thoughts
I hope this recipe brings a sprinkle of magic into your kitchen! There’s something truly special about indulging in a dessert inspired by imagination and nostalgia. Enjoy every bite as you create delicious memories with loved ones while making this delightful Butterbeer cheesecake. Happy baking!
Butterbeer Cheesecake
Indulge in the enchanting flavors of our Butterbeer cheesecake, a creamy dessert that brings a touch of magic to any occasion! This delightful cheesecake combines the sweet notes of butterscotch and cream soda, making it an irresistible treat for both kids and adults alike. Perfect for family gatherings, birthdays, or simply a cozy night in, this make-ahead dessert allows you to enjoy the festivities without the fuss. With just 15 minutes of prep time, you can whip up this creamy delight and let it chill overnight. Top it with cool whip and a drizzle of butterscotch sauce for that extra flair, ensuring this cheesecake will impress everyone at the table.
- Prep Time: 15 minutes
- Cook Time: 60 minutes
- Total Time: 1 hour 15 minutes
- Yield: Serves approximately 12 slices 1x
- Category: Dessert
- Method: Baking
- Cuisine: American
Ingredients
- 2 cups graham cracker crumbs
- 1/4 cup granulated sugar
- 1/2 cup unsalted butter, melted
- 4 (8 oz.) packages cream cheese, softened
- 1/2 cup sour cream
- 3 large eggs
- 2 cups granulated sugar
- 1/2 tablespoon vanilla extract
- 1/2 tablespoon butter flavoring
- 1/2 cup butterscotch sauce
- 1/4 cup cream soda
- Cool whip for topping
Instructions
- Preheat your oven to 325°F (160°C).
- In a mixing bowl, combine graham cracker crumbs, sugar, and melted butter; press into the bottom of an 8-inch springform pan.
- Beat softened cream cheese until smooth; mix in sour cream and gradually add sugar.
- Add eggs one at a time, then stir in vanilla extract and butter flavoring.
- Mix in butterscotch sauce and cream soda until well blended.
- Pour filling over crust and bake for about 60 minutes or until set around the edges.
- Allow cooling in the oven with door ajar for an hour before refrigerating for at least four hours or overnight.
- Top with cool whip before serving.
Nutrition
- Serving Size: 1 serving
- Calories: 350
- Sugar: 32g
- Sodium: 280mg
- Fat: 24g
- Saturated Fat: 14g
- Unsaturated Fat: 10g
- Trans Fat: 0g
- Carbohydrates: 30g
- Fiber: 1g
- Protein: 5g
- Cholesterol: 75mg