Cannoli Cookies
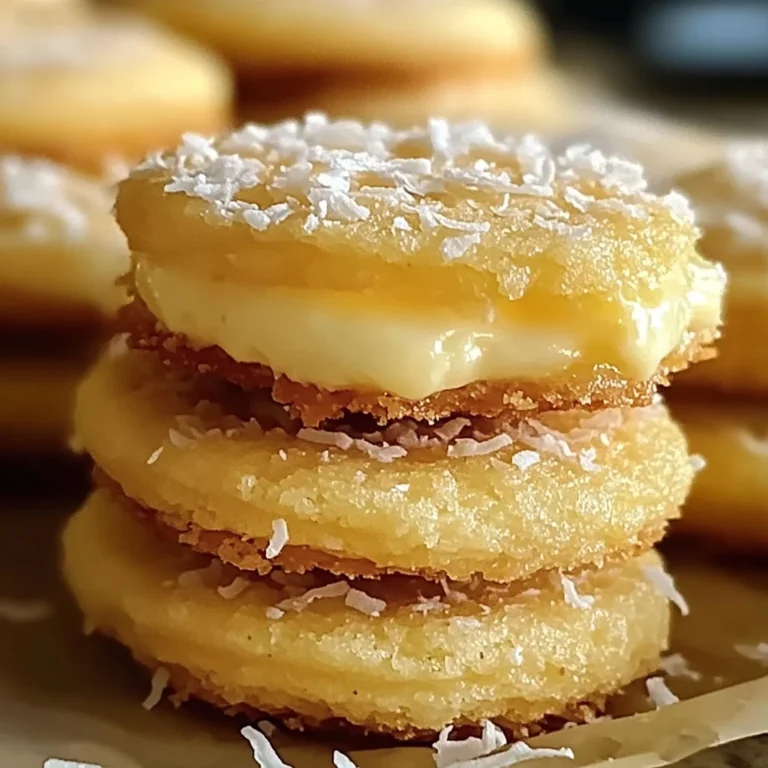
If you’re looking for a sweet treat that’s both comforting and elegant, you’ve come to the right place! Cannoli Cookies are a delightful twist on the classic Italian dessert, combining crispy cookie shells with creamy ricotta filling. This recipe is close to my heart because it brings back memories of family gatherings, where we would savor these treats together. Whether you’re hosting a dinner party or just want to indulge on a busy weeknight, these cookies are sure to impress.
Making Cannoli Cookies is not only simple but also a fun activity to share with loved ones. They’re perfect for any occasion—birthday celebrations, holiday feasts, or just a cozy night in with your favorite book. Let’s dive into why you’ll love this recipe!
Why You’ll Love This Recipe
- Quick and Easy: With just a few steps, you can whip up these delicious cookies in no time.
- Family-Friendly: Kids will love helping to fill the cookies with the creamy ricotta mixture!
- Make-Ahead Convenience: These cookies store well, so you can bake them in advance and enjoy them later.
- Irresistible Flavor: The combination of vanilla, lemon zest, and chocolate chips makes every bite irresistible.
- Elegant Presentation: These cookies look beautiful on any dessert platter, making them a hit at gatherings.
Ingredients You’ll Need
These are simple, wholesome ingredients that come together beautifully to create Cannoli Cookies. Let’s gather what you need!
For the Cookie Shells
- 1 cup (240 ml) of all-purpose flour
- ½ cup (100 g) of granulated sugar
- 1 large egg
- 1 tsp of vanilla extract
- 1 tsp of lemon zest
For the Filling
- ½ cup (120 g) of ricotta cheese
- ½ cup (75 g) of mini chocolate chips
- ½ cup (75 g) of chopped pistachios
- Powdered sugar for dusting
Variations
This Cannoli Cookies recipe is wonderfully flexible! Feel free to get creative and make it your own with these fun variations:
- Add citrus zest: Enhance flavor by adding orange zest along with or instead of lemon zest.
- Change the nuts: Swap pistachios for walnuts or almonds for a different nutty flavor.
- Mix up the chocolates: Use white chocolate chips or dark chocolate chunks for a unique twist.
- Try flavored ricotta: Infuse your filling with almond extract or cinnamon for an exciting flavor boost.
How to Make Cannoli Cookies
Step 1: Preheat Your Oven
Start by preheating your oven to 350°F (175°C). Preheating ensures even baking and helps achieve that lovely golden-brown color we all love.
Step 2: Combine Dry Ingredients
In a large bowl, whisk together the flour and sugar until they are well blended. This step is crucial because it helps distribute the sugar evenly throughout the dough.
Step 3: Mix Wet Ingredients
In another bowl, mix together the ricotta cheese, egg, vanilla extract, and lemon zest until smooth. This mixture creates a creamy filling that will balance perfectly with the crispy cookie shell.
Step 4: Form the Dough
Gradually stir the dry mixture into the wet ingredients until a soft dough forms. This is where your dough starts to come together! Be gentle; overmixing can lead to tough cookies.
Step 5: Let It Rest
Cover your dough and let it rest for about 30 minutes. Allowing it to rest makes it easier to roll out and helps develop flavors.
Step 6: Prepare Your Baking Sheets
Line baking sheets with parchment paper. This prevents sticking and ensures easy cleanup later on!
Step 7: Roll Out Dough
Dust your work surface with flour and roll out the dough to about ¼ inch thick. Rolling it thinly allows for those delightful crispy edges.
Step 8: Cut Into Shapes
Cut the rolled dough into rectangles or squares approximately 2×3 inches. These shapes will form the cute little pockets for your filling!
Step 9: Prep the Filling
In a small bowl, combine ricotta cheese, mini chocolate chips, and chopped pistachios. This filling is where all that deliciousness happens—make sure it’s well mixed!
Step 10: Fill and Seal
Place a spoonful of filling in the center of each rectangle and fold over to seal. Press down firmly at the edges—this helps ensure none of that sweet goodness escapes while baking.
Step 11: Bake Until Golden Brown
Bake for about 15-18 minutes until they turn golden brown. Watching them rise in the oven is part of the excitement!
Step 12: Cool Before Serving
Let them cool on baking sheets for a few minutes before transferring them to a wire rack. This cooling period allows them to set properly so they stay crisp when served.
And there you have it! Delicious Cannoli Cookies that are bound to become a beloved favorite in your home! Enjoy every last bite!
Pro Tips for Making Cannoli Cookies
Making Cannoli Cookies is a fun and rewarding experience, so here are some pro tips to ensure your cookies turn out perfectly every time!
-
Use Fresh Ricotta: Fresh ricotta will provide a creamier texture and richer flavor. Avoid pre-packaged options if possible, as they can be grainy and less flavorful.
-
Chill the Dough: Allowing the dough to rest not only makes it easier to handle but also enhances the flavors. It gives the ingredients time to meld together and results in a more delicious cookie.
-
Don’t Overfill: When adding the filling, use just enough to fill the center without overflowing. This helps keep the cookies intact while baking and ensures an ideal ratio of cookie to filling.
-
Bake Until Golden: Keep an eye on your cookies as they bake. The perfect Cannoli Cookie should be golden brown on the edges for that delightful crispiness while remaining soft inside.
-
Dust with Powdered Sugar Just Before Serving: For a beautiful presentation, dust your cookies with powdered sugar right before serving. This keeps it looking fresh and adds that extra touch of sweetness.
How to Serve Cannoli Cookies
Presenting your Cannoli Cookies in style can make them even more enjoyable! Here are some delightful ideas to elevate your dessert experience.
Garnishes
-
Chopped Pistachios: Sprinkle some additional chopped pistachios on top of each cookie for added crunch and visual appeal.
-
Chocolate Drizzle: A light drizzle of melted dairy-free chocolate over the cooled cookies can enhance both taste and presentation, making them look irresistible!
Side Dishes
-
Fresh Berries: A side of fresh strawberries, raspberries, or blueberries adds a refreshing contrast to the sweetness of the cookies. The acidity from the berries balances out the rich filling beautifully.
-
Vanilla Almond Milk: A glass of chilled vanilla almond milk complements these cookies wonderfully. Its creamy texture pairs nicely with the crispy cannoli outside.
-
Coffee or Espresso: For coffee lovers, serving these cookies alongside a cup of brewed coffee or espresso creates an indulgent pairing that’s simply divine!
-
Coconut Whipped Cream: A dollop of coconut whipped cream on the side adds a luscious element that encourages dipping or spreading onto each cookie.
Enjoy crafting these delicious Cannoli Cookies and sharing them with loved ones! They’re sure to be a hit at any gathering or simply as a special treat for yourself. Happy baking!
Make Ahead and Storage
These Cannoli Cookies are perfect for meal prep, allowing you to enjoy a delightful treat whenever the craving strikes! With the right storage techniques, you can keep these cookies fresh and ready to satisfy your sweet tooth.
Storing Leftovers
- Store leftover Cannoli Cookies in an airtight container at room temperature for up to 3 days.
- If you prefer them chilled, keep them in the fridge for up to a week.
- Avoid stacking the cookies on top of each other to prevent them from becoming soggy.
Freezing
- To freeze, place individual cookies in a single layer on a baking sheet and freeze until firm.
- Once frozen, transfer the cookies to a freezer-safe bag or container.
- They can be stored in the freezer for up to 3 months.
Reheating
- Thaw frozen cookies in the refrigerator overnight before serving.
- For a warm treat, reheat in the oven at 300°F (150°C) for about 5-7 minutes or until heated through.
FAQs
Have some questions about making these delicious Cannoli Cookies? We’ve got you covered!
Can I use different fillings for Cannoli Cookies?
Absolutely! Feel free to experiment with different fillings like mascarpone cheese or fruit preserves. Just make sure they are similar in consistency to ricotta.
How do I make Cannoli Cookies gluten-free?
You can substitute all-purpose flour with a gluten-free flour blend. Just ensure that it works well for baking to maintain the texture of your cookies.
What is the best way to enjoy Cannoli Cookies?
These cookies are delightful on their own, but you can enhance them with a dusting of powdered sugar or serve them alongside a scoop of your favorite non-dairy ice cream!
Can I prepare the dough for Cannoli Cookies ahead of time?
Yes! You can make the dough ahead of time and store it in the fridge for up to 2 days before rolling out and baking.
Final Thoughts
I hope you enjoy making these delightful Cannoli Cookies as much as I do! They bring together crispy and creamy textures that are simply irresistible. Whether you’re sharing them with friends or savoring them yourself, these cookies are sure to brighten your day. So roll up your sleeves and get baking—happy cooking!
Cannoli Cookies
Indulge in the delightful world of Cannoli Cookies, a unique twist on the classic Italian dessert. These scrumptious cookies feature crispy shells filled with a luscious mixture of creamy ricotta and sweet chocolate chips, providing a perfect balance of texture and flavor. Whether you’re hosting a gathering or simply treating yourself to something special, these cookies are sure to impress. Easy to make and even more enjoyable to share, they capture the essence of nostalgia while inviting creativity in your kitchen.
- Prep Time: 20 minutes
- Cook Time: 18 minutes
- Total Time: 38 minutes
- Yield: Approximately 12 cookies 1x
- Category: Dessert
- Method: Baking
- Cuisine: Italian
Ingredients
- 1 cup all-purpose flour
- ½ cup granulated sugar
- 1 large egg
- 1 tsp vanilla extract
- 1 tsp lemon zest
- ½ cup ricotta cheese
- ½ cup mini chocolate chips
- ½ cup chopped pistachios
- Powdered sugar for dusting
Instructions
- Preheat your oven to 350°F (175°C).
- In a large bowl, whisk together flour and sugar.
- In another bowl, mix ricotta, egg, vanilla extract, and lemon zest until smooth.
- Gradually combine the dry ingredients with the wet ingredients until a soft dough forms.
- Let the dough rest for about 30 minutes.
- Roll out the dough to about ¼ inch thick on a floured surface.
- Cut into rectangles (2×3 inches) and prepare your filling by mixing ricotta, chocolate chips, and pistachios in a bowl.
- Place filling on each rectangle, fold over, and seal edges.
- Bake for 15-18 minutes until golden brown.
- Cool before serving and dust with powdered sugar.
Nutrition
- Serving Size: 1 cookie (30g)
- Calories: 140
- Sugar: 6g
- Sodium: 50mg
- Fat: 5g
- Saturated Fat: 2g
- Unsaturated Fat: 3g
- Trans Fat: 0g
- Carbohydrates: 20g
- Fiber: 0g
- Protein: 3g
- Cholesterol: 15mg

