Japanese Katsu Bowls: A Delicious Guide to Making Authentic Katsu at Home
If you’re looking for a comforting meal that’s sure to please everyone at the table, you’ve come to the right place! Japanese Katsu Bowls: A Delicious Guide to Making Authentic Katsu at Home is what you need. This dish is not just about crispy chicken; it’s a delightful combination of flavors and textures that makes for a satisfying dinner on busy weeknights or an impressive centerpiece for family gatherings.
The golden-brown chicken paired with perfectly seasoned rice and tangy sauce creates a meal that feels special, yet it’s surprisingly easy to prepare. Once you try this recipe, I promise it will become a staple in your home!
Why You’ll Love This Recipe
- Quick and Easy Preparation: With simple steps, you can whip up this delicious meal in just an hour.
- Family-Friendly Appeal: Kids and adults alike will love the crispy katsu and flavorful rice.
- Customizable Ingredients: Swap out proteins or add your favorite veggies to make this dish your own!
- Perfect for Any Occasion: Whether it’s a cozy night in or a gathering with friends, Katsu Bowls fit right in.
Ingredients You’ll Need
This recipe uses simple, wholesome ingredients that you might already have in your kitchen. Each one plays an important role in creating that authentic flavor we all crave.
For the Chicken Katsu
- 2 boneless chicken breasts (or beef loin, if preferred)
- Salt and pepper, to taste
- 1 cup all-purpose flour
- 2 large eggs
- 1 cup panko breadcrumbs
- Vegetable oil, for frying
For the Rice
- 2 cups Japanese short-grain rice
- 2 ½ cups water
- 1 tablespoon rice vinegar
- 1 tablespoon sugar
- ½ teaspoon salt
For the Sauce and Garnish
- ¼ cup tonkatsu sauce (or store-bought if you prefer)
- 1 tablespoon soy sauce
- 1 teaspoon Worcestershire sauce
- 1 teaspoon ketchup
- 1 cup shredded cabbage
- 2 green onions, sliced
- Sesame seeds, for garnish
- Pickled ginger (optional)
Variations
One of the best things about making Japanese Katsu Bowls is how flexible the recipe can be! Feel free to get creative and adapt it to your taste preferences.
- Swap the protein: Try using beef loin or tofu for a vegetarian option—both work beautifully!
- Add extra veggies: Incorporate steamed broccoli or carrots into your bowl for added nutrition and color.
- Make it spicy: Drizzle some sriracha or chili oil over your katsu for a little kick.
- Change up the sauce: Experiment with different sauces like hoisin or sweet chili for unique flavor profiles.
How to Make Japanese Katsu Bowls: A Delicious Guide to Making Authentic Katsu at Home
Step 1: Rinse the Rice
Rinsing the rice is crucial as it removes excess starch that can make your rice gummy. Rinse under cold water until the water runs clear; this will help achieve fluffy grains once cooked.
Step 2: Soak and Cook the Rice
Transfer the rinsed rice to a saucepan, add water, and soak for about 30 minutes. Soaking helps soften the grains, ensuring they cook evenly. Cover, bring to a boil, then reduce heat and simmer without lifting the lid—this keeps all those lovely steam flavors locked in!
Step 3: Season Your Rice
After cooking, let your rice sit covered off heat for another 10 minutes. While it’s resting, mix together rice vinegar, sugar, and salt until dissolved. Gently fold this mixture into your rice; it gives each bite a delightful tang!
Step 4: Prepare the Chicken Breasts
Pound those chicken breasts down to about half an inch thick. This ensures they cook evenly and stay juicy inside. Season them well with salt and pepper—flavor starts here!
Step 5: Set Up Your Breading Station
Creating a breading station with flour, beaten eggs, and panko breadcrumbs makes coating easy. Dredge each piece of chicken in flour first (this helps the egg stick), dip into eggs next, then coat thoroughly with panko for that signature crunch.
Step 6: Fry Until Golden Brown
Heat vegetable oil in a skillet over medium heat. Fry each chicken piece for about 4-5 minutes on each side until golden brown. The aroma will be mouthwatering! Drain on paper towels afterward—this keeps them crispy.
Step 7: Make Your Sauce
In a bowl, combine tonkatsu sauce, soy sauce, Worcestershire sauce, and ketchup. Mixing these sauces creates a delicious drizzle that enhances every bite of katsu.
Step 8: Assemble Your Bowl
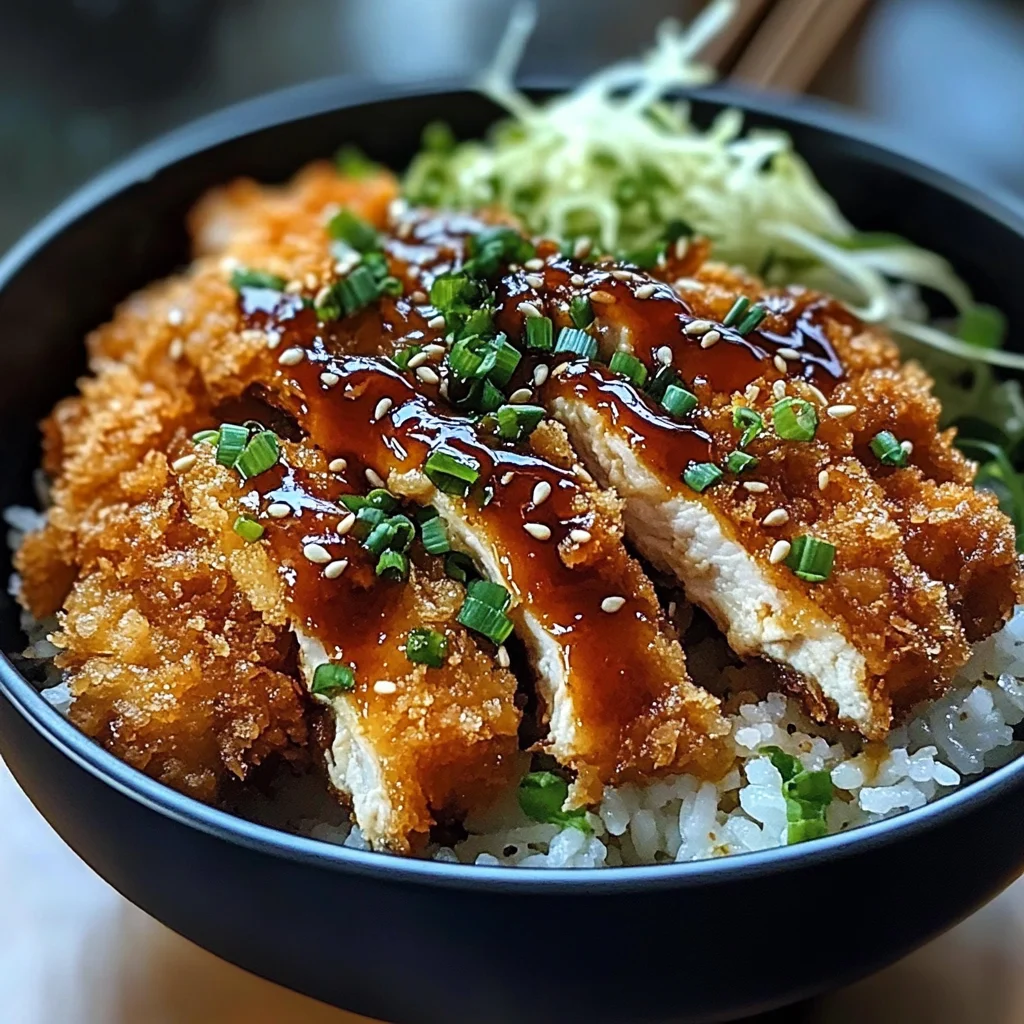
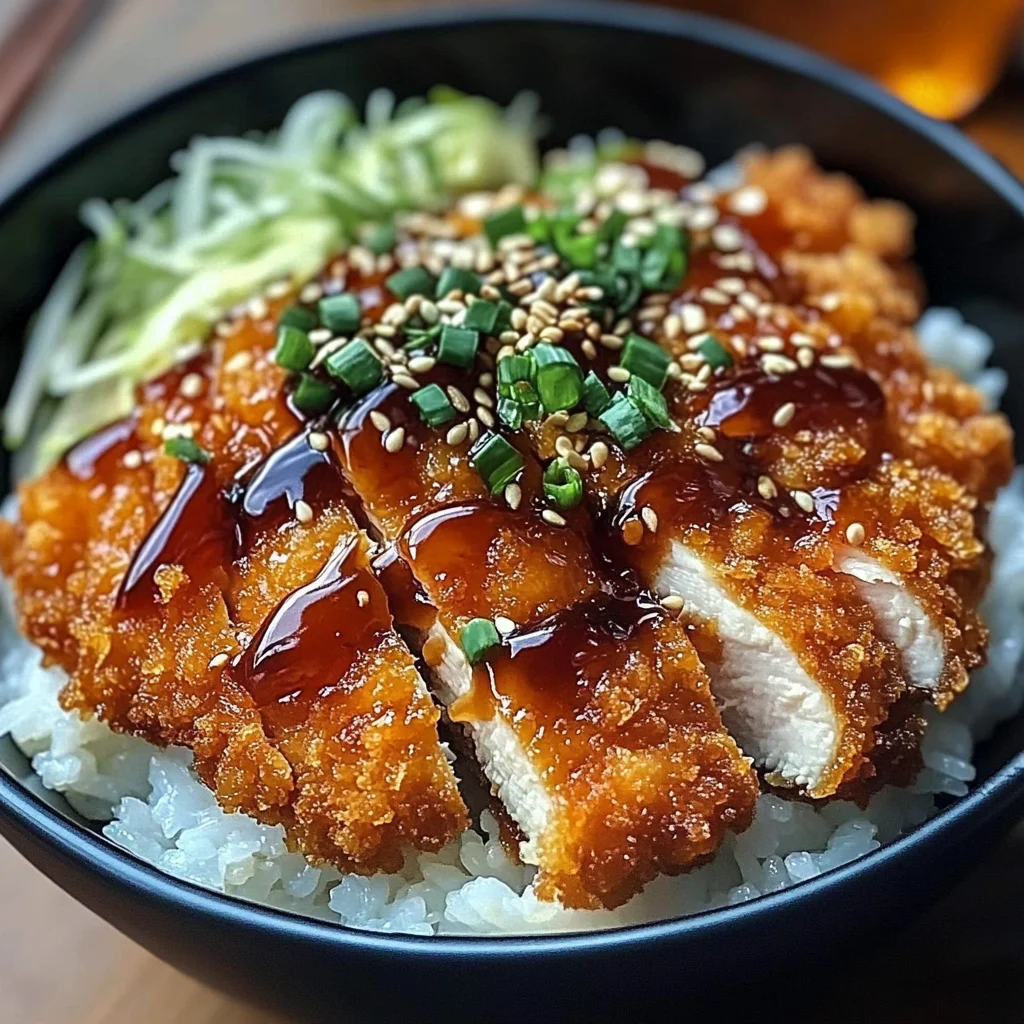
To serve, place warm rice onto plates, top with sliced katsu, add shredded cabbage for crunch, sprinkle green onions and sesame seeds on top. Drizzle with your homemade sauce and add pickled ginger if you’d like!
And there you have it—a beautiful plate of homemade Japanese Katsu Bowls ready to enjoy!
Pro Tips for Making Japanese Katsu Bowls: A Delicious Guide to Making Authentic Katsu at Home
Making the perfect katsu may seem daunting, but with a few helpful tips, you can achieve that crispy, restaurant-quality result right in your kitchen!
-
Use panko breadcrumbs: Panko provides a lighter and crispier texture compared to regular breadcrumbs. This gives your katsu that authentic crunch that everyone loves.
-
Monitor oil temperature: Keeping the oil at the right temperature (around 350°F or 175°C) ensures even cooking and prevents sogginess. If the oil is too hot, the outside will burn while the inside remains raw; too cool, and it will absorb excess oil.
-
Let it rest before slicing: After frying, allowing your chicken katsu to rest for a few minutes helps retain moisture and makes slicing easier. This way, you’ll have juicy meat rather than dry pieces.
-
Customize your sauce: Feel free to tweak the sauce ingredients based on your taste! Adding a bit of sriracha for heat or honey for sweetness can create a personalized flavor that complements the katsu beautifully.
-
Prep ahead of time: You can prepare the rice and sauce in advance and simply fry the chicken when you’re ready to serve. This not only saves time but also allows you to enjoy your meal without stress.
How to Serve Japanese Katsu Bowls: A Delicious Guide to Making Authentic Katsu at Home
Presenting your Japanese Katsu Bowl beautifully can enhance the dining experience. Here are some ideas on how to arrange this delightful dish for an impressive display.
Garnishes
- Shredded cabbage: A fresh bed of finely shredded cabbage adds a crunchy texture and balances out the richness of the katsu.
- Sesame seeds: Sprinkling toasted sesame seeds on top offers a nutty flavor and a touch of elegance.
- Pickled ginger: A small serving of pickled ginger can provide a refreshing contrast to the flavors in your bowl.
Side Dishes
- Miso Soup: This comforting soup made from miso paste, tofu, and seaweed is a classic Japanese starter that complements katsu perfectly.
- Edamame: Lightly salted, these steamed young soybeans make for an excellent protein-packed snack or side dish that pairs well with rice.
- Japanese Potato Salad: Creamy and slightly sweet with veggies like cucumber and carrots, this salad adds a delicious contrast to the crispy katsu.
- Seaweed Salad: Refreshing and slightly tangy, seaweed salad introduces different textures and flavors while enhancing your meal’s overall experience.
Enjoy crafting your Japanese Katsu Bowl masterpiece, complete with thoughtful garnishes and side dishes that bring it all together!
Make Ahead and Storage
This Japanese Katsu Bowl recipe is perfect for meal prep, making it easy to enjoy delicious homemade katsu throughout the week. Here’s how to store your leftovers, freeze them for later, and reheat them without losing that delightful crunch.
Storing Leftovers
- Store any leftover chicken katsu in an airtight container in the refrigerator.
- Keep the rice and katsu separate to maintain the texture of both.
- Consume the leftovers within 2-3 days for the best quality.
Freezing
- Allow the cooked chicken katsu to cool completely before freezing.
- Place the katsu in a single layer on a baking sheet and freeze until firm, then transfer to an airtight freezer bag.
- The rice can also be frozen in an airtight container; use within 1 month for optimal flavor.
Reheating
- To reheat chicken katsu, place it in a preheated oven at 375°F (190°C) for about 10-15 minutes until heated through and crispy.
- For rice, sprinkle a few drops of water over it in a microwave-safe bowl and cover with a damp paper towel. Heat for about 1 minute or until warm.
FAQs
Here are some frequently asked questions to help you make the most of your Japanese Katsu Bowls!
Can I use beef instead of chicken in Japanese Katsu Bowls?
Absolutely! You can substitute chicken with beef loin if you prefer. Just follow the same breading method for a delicious twist.
How do I achieve the perfect crunch for my Japanese Katsu Bowls?
The secret to achieving that perfect crunch lies in using panko breadcrumbs! They create a light, crispy coating when fried.
Can I make Japanese Katsu Bowls ahead of time?
Yes! You can prepare the components ahead of time. Follow the storing instructions above for optimal freshness.
What type of rice is best for Japanese Katsu Bowls?
Japanese short-grain rice is ideal as it becomes sticky when cooked, complementing the crispy katsu perfectly.
Are there any vegetarian alternatives for this recipe?
Certainly! You can replace chicken with tofu or eggplant, using the same breading technique to create a satisfying vegetarian option.
Final Thoughts
I hope you’re as excited about making these Japanese Katsu Bowls as I am! This dish brings together crispy, tender katsu and flavorful rice that’s sure to impress family and friends alike. Enjoy every bite and don’t hesitate to get creative with your toppings! Happy cooking!
Japanese Katsu Bowls
If you’re in search of a comforting yet impressive meal, look no further than Japanese Katsu Bowls. This delightful dish combines crispy chicken (or beef) with perfectly seasoned rice and a tangy sauce, making it a satisfying option for busy weeknights or special family gatherings. With its enticing blend of flavors and textures, this recipe is sure to become a staple in your kitchen. Plus, it’s surprisingly easy to prepare!
- Prep Time: 20 minutes
- Cook Time: 30 minutes
- Total Time: 50 minutes
- Yield: Serves 4
- Category: Dinner
- Method: Frying
- Cuisine: Japanese
Ingredients
- 2 boneless chicken breasts (or beef loin)
- 1 cup all-purpose flour
- 2 large eggs
- 1 cup panko breadcrumbs
- 2 cups Japanese short-grain rice
- ¼ cup tonkatsu sauce
- 1 tablespoon soy sauce
- Shredded cabbage
- Green onions and sesame seeds for garnish
Instructions
- Rinse the rice under cold water until clear. Soak in water for 30 minutes, then cook with fresh water according to package instructions.
- Pound chicken breasts to an even thickness, season with salt and pepper.
- Set up a breading station: dredge chicken in flour, dip in beaten eggs, and coat with panko.
- Heat vegetable oil in a skillet over medium heat and fry each piece until golden brown on both sides, about 4-5 minutes each.
- Mix tonkatsu sauce, soy sauce, and ketchup in a bowl.
- Assemble your bowls: place rice at the bottom, top with katsu slices, add shredded cabbage, drizzle with sauce, and garnish.
Nutrition
- Serving Size: 1 bowl (350g)
- Calories: 650
- Sugar: 3g
- Sodium: 850mg
- Fat: 28g
- Saturated Fat: 4g
- Unsaturated Fat: 22g
- Trans Fat: 0g
- Carbohydrates: 76g
- Fiber: 4g
- Protein: 28g
- Cholesterol: 180mg